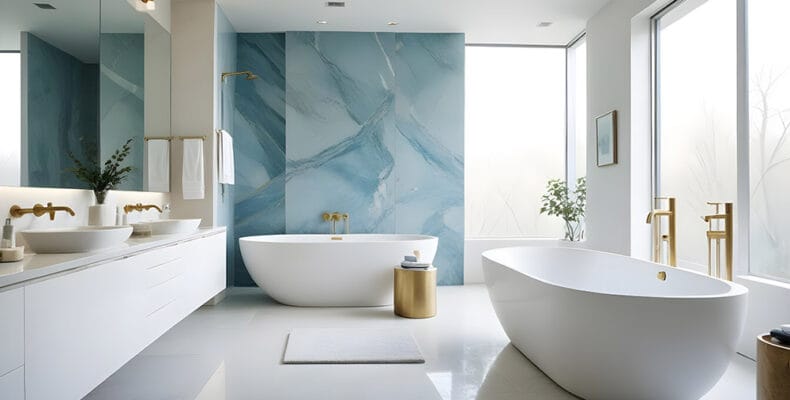
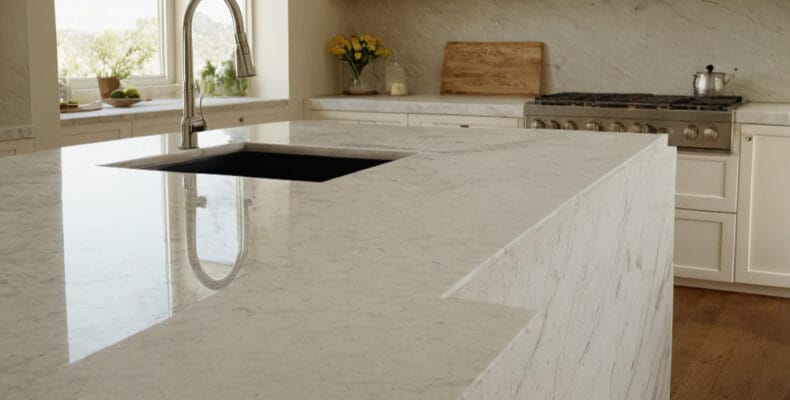
Sacramento Countertops: The Smartest Design Investment You Can Make

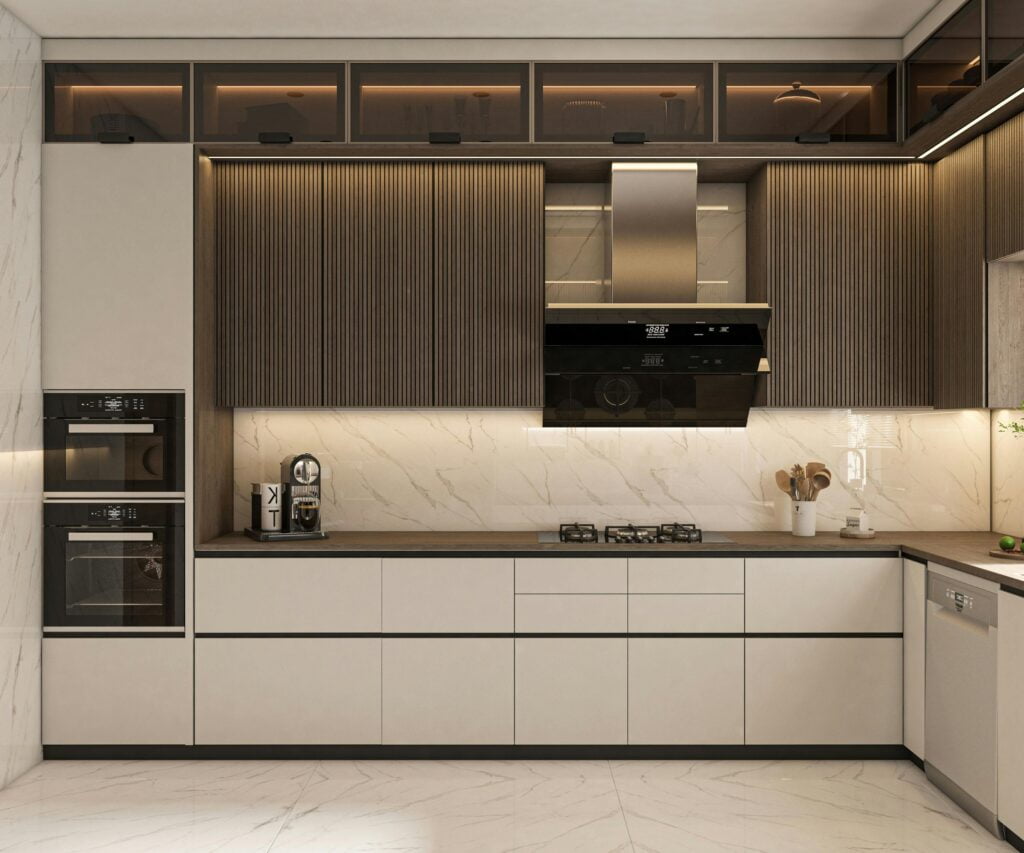
Sacramento countertops

When it comes to remodeling, countertops often get treated as a finishing touch — something you choose after cabinets and flooring are locked in. But in reality, your countertops do much more than complete the look. They define how your kitchen or bathroom functions, how long it lasts, and how much value it adds to your home.

If you live in Northern California and are exploring Sacramento countertops, here’s the good news: today’s materials, styles, and data-backed trends make it easier than ever to invest wisely — and beautifully.


💡 Why Countertops Matter More Than You Think

The kitchen isn’t just a workspace. It’s the heart of the home. It’s where meals are made, guests gather, and memories happen. And the surfaces you interact with every day? They deserve more than a last-minute decision.

In recent years, market data shows that countertop upgrades offer some of the highest ROI of any design feature in a kitchen or bath renovation. In Sacramento, a well-executed remodel that includes modern, durable countertops can yield up to a 70–80% return on investment, especially when paired with neutral, timeless materials.

So yes — countertops are functional. But they’re also emotional. The right ones make a space feel complete.


📊 Countertop Trends in Sacramento: What the Data Says

According to regional remodeling reports and Sacramento design surveys:

  • Quartz countertops are the top choice among homeowners, representing nearly 52% of current installations in mid- to high-end homes.

  • Natural stone (granite, marble) still holds strong appeal for custom builds and luxury remodels.

  • Eco-friendly and recycled materials are gaining traction, particularly in green-conscious communities.

  • Matte finishes, waterfall edges, and integrated sinks are high on the “want” list among modern Sacramento buyers.

These trends aren’t just aesthetic — they reflect how people live today. Durable, easy-to-clean, low-maintenance materials are in high demand, especially for busy households.

Sacramento countertops

🏡 Function Meets Form: Choosing the Right Material

Let’s break down the top options available in the Sacramento countertops market — and what each brings to the table (literally):

1. Quartz

  • Pros: Non-porous, scratch- and stain-resistant, low-maintenance, wide color range

  • Perfect for: Families, cooks, and anyone who wants beauty without babysitting

  • Average price: $75–$120 per square foot installed

2. Granite

  • Pros: Natural variation, heat-resistant, adds resale value

  • Perfect for: Traditional or luxury designs, kitchens with bold focal points

  • Average price: $60–$100 per square foot

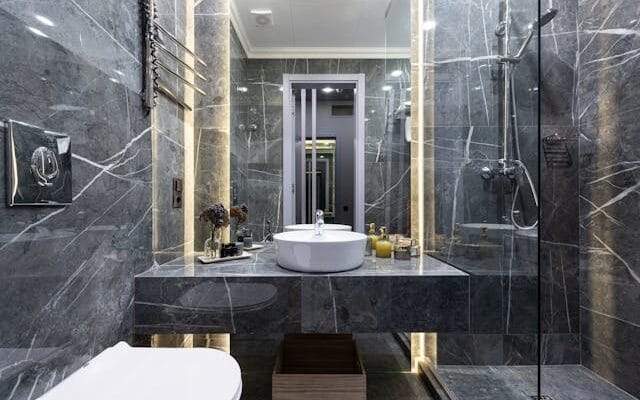
3. Marble

  • Pros: Iconic luxury look, excellent for baking surfaces

  • Perfect for: Statement kitchens, light-traffic bathrooms

  • Average price: $80–$150 per square foot

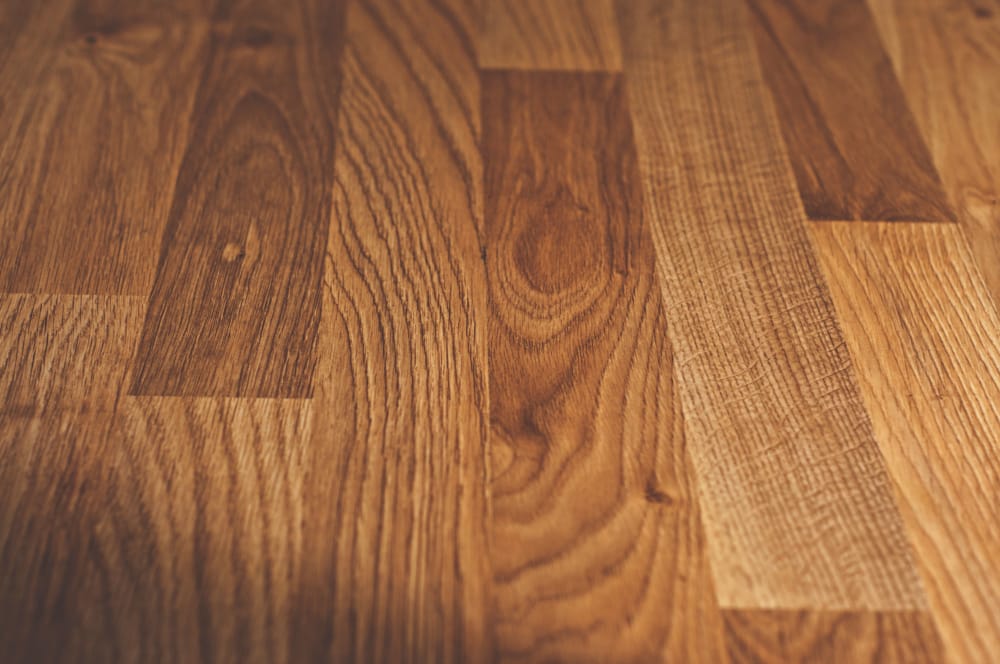
4. Butcher Block

  • Pros: Warm, natural texture; great for farmhouse or rustic spaces

  • Perfect for: Accent islands or homes embracing an organic feel

  • Average price: $40–$70 per square foot

5. Recycled/Green Materials

  • Pros: Sustainable, often customizable, unique look

  • Perfect for: Eco-conscious homeowners, modern interiors

  • Average price: $50–$100 per square foot

Remember: the smartest design decision is one that blends functionality and feeling. Choose the countertop you’ll love living with — not just looking at.


🌟 Inspiration from Real Sacramento Homes

Design-savvy homeowners across the region are redefining what countertops can do:

  • In East Sacramento, a young couple paired white quartz counters with walnut cabinetry, creating contrast and lightness in a small kitchen.

  • In Rocklin, a family upgraded to honed black granite for durability and drama — and saw their home’s resale value increase by 8%.

  • In Folsom, an eco-focused remodel featured recycled glass slabs, turning sustainability into a statement piece.

The common thread? These homes used countertops not just as surfaces, but as style foundations.


🔧 Installation Insights: What to Expect

When investing in Sacramento countertops, here’s what a typical timeline looks like:

  1. Template & measurements – precise digital scans of your space

  2. Material selection & slab viewing – especially important for natural stone

  3. Fabrication – edges, cutouts, and polish tailored to your layout

  4. Installation – typically completed in 1–2 days

Pro tip: Always review the seams, check for color consistency (especially with natural stone), and confirm warranties before installation.


💬 Final Thought: A Smart Investment That Inspires Daily Living

Countertops are touched, seen, and used more than almost any other element in your home. Choosing the right surface — one that suits your lifestyle, aesthetic, and budget — is one of the smartest design investments you can make.

Whether you’re dreaming of sleek quartz, classic marble, or something uniquely your own, Sacramento countertops offer endless opportunities to elevate your space — and your everyday life.

Let your surfaces do more than support your morning coffee. Let them support the way you live.

read more

Parquet Flooring: A Story of Craftsmanship and Home Evolution

Parquet Flooring

Walk into a centuries-old European chateau, and the first thing that often greets you is the artistry beneath your feet. The sweeping halls lined with patterned hardwood tell stories of royalty, artisanship, and a devotion to detail that defined entire eras of architecture. This isn’t just flooring—it’s heritage. And today, homeowners across the world are rediscovering its allure as part of their own home transformations.

Of course, flooring is just one chapter in the broader narrative of a remodel. As families explore upgrade inspiration for their living spaces, parquet offers a way to bridge history with modern design.


From Palaces to Homes

Parquet wood panels first became popular in 17th-century France, replacing marble floors that were prone to moisture damage. Craftsmen arranged small blocks of oak, walnut, and maple into intricate geometric wood flooring that reflected the grandeur of the times.

Fast forward to today, and homeowners no longer need palatial estates to enjoy these designs. The same mosaic wood floors once reserved for nobility now appear in suburban living rooms, city lofts, and modern kitchens.


Craftsmanship Carried Forward

What makes parquet unique is the precision required in its creation:

  • Material Selection: Each plank is chosen not just for durability, but for its grain pattern and color harmony.

  • Design Execution: Laying decorative timber flooring involves artistry—each angle and cut contributes to a seamless design.

  • Lasting Quality: Properly installed, parquet outlives design trends and continues to impress decades later.

In essence, every installation is a collaboration between wood, craftsman, and homeowner.

Parquet Flooring

Stories in Patterns

Every design tells its own tale:

  • Herringbone: A nod to Renaissance halls and stately manors.

  • Chevron: The bold lines of progress and modern ambition.

  • Basket Weave: Intimate, woven charm reminiscent of family gathering spaces.

By choosing a specific pattern, you’re not just installing floors—you’re embedding a narrative in your home.


Parquet in the Modern Context

While rooted in history, parquet adapts beautifully to contemporary lifestyles:

  • Energy Efficiency: The density of patterned hardwood helps regulate room temperature.

  • Resale Appeal: Buyers often recognize parquet as a premium upgrade.

  • Personal Expression: With custom inlays, you can craft designs as unique as your family’s story.

It’s this blend of old and new that makes parquet so captivating today.


Wrap-Up

Every homeowner wants their remodel to reflect a personal journey. Parquet flooring offers a direct link between the artistry of the past and the functionality of the present. When woven into a broader remodel, it becomes both a conversation piece and a foundation for everyday living.

👉 If you’re planning a renovation that honors both history and modern needs, explore parquet designs with a contractor skilled in historic preservation techniques.

read more

The Smart Homeowner’s Guide to Bathroom Remodels in Sacramento—By the Numbers

The Smart Homeowner’s Guide to Bathroom Remodels in Sacramento—By the Numbers

If you’ve been thinking about updating your bathroom, you’re in good company. In 2025, bathroom remodels Sacramento are on the rise—not just for aesthetics, but for comfort, energy efficiency, and long-term value.

As designer Sarah Richardson often proves, the best design is backed by both style and substance. Whether you’re working with a modest powder room or a dated master bath, the right renovation decisions are made by balancing data, design, and daily function.

Here’s a breakdown of what Sacramento homeowners need to know—before they swing a single hammer.


💰 What Does a Bathroom Remodel in Sacramento Actually Cost?

Based on 2024–2025 local industry data:

Remodel TypeEstimated CostTypical ROI
Cosmetic Refresh$8,000–$15,000~60%
Mid-Range Full Remodel$20,000–$35,00065–70%
High-End Custom Build$40,000–$70,000+55–65%

Key insight: Mid-range remodels tend to deliver the highest return on investment—offering a balance of performance and design updates that matter to buyers and appraisers alike.


🛠️ Which Features Deliver the Most Value?

Some upgrades deliver visual impact—but others deliver long-term function. These are the most valuable bathroom improvements for Sacramento homes:

  • Walk-In Shower with Frameless Glass

    • Adds accessibility and modern appeal

    • Cost: $4K–$10K

    • ROI: High (especially for aging-in-place buyers)

  • Double Vanity

    • Boosts storage and resale appeal

    • Cost: $1,500–$5,000

    • ROI: Moderate to high in master suites

  • Heated Floors

    • Luxury feature with increasing demand

    • Cost: $1,500–$2,800

    • ROI: Medium, but strong lifestyle boost

  • Energy-Efficient Fixtures & LED Lighting

    • Lower long-term operating costs

    • Cost: $800–$2,500

    • ROI: High through energy savings and resale appeal

The Smart Homeowner’s Guide to Bathroom Remodels in Sacramento—By the Numbers

📈 Sacramento Housing Trends Affecting Remodel Choices

According to the Sacramento Association of Realtors:

  • Homes with updated bathrooms sell 27% faster than those without

  • Buyer demand is highest for homes with 2+ full bathrooms and modern, neutral design

  • In 2025, Sacramento saw a 7.6% increase in bathroom remodel permit filings—indicating a sharp shift toward home value reinvestment

Sarah’s Rule of Thumb: Design for what works today—but with a view toward tomorrow’s buyer.


🎨 What Design Choices Are Leading the Market?

Sacramento homeowners are gravitating toward:

  • Warm whites, soft greys, and matte finishes

  • Porcelain and ceramic tile over high-maintenance stone

  • Floating vanities to increase floor visibility in small spaces

  • Niche storage and integrated shelving for function without clutter

Timeless always wins over trendy.


🧠 Pro Tip: Think Beyond Surface-Level

Remodeling your bathroom is more than tile and fixtures. It’s also your chance to:

  • Replace aging plumbing and avoid future leaks

  • Improve ventilation and indoor air quality

  • Increase insulation behind walls for better energy efficiency

  • Update to GFCI outlets for safety and code compliance

These aren’t flashy—but they’re foundational.


✅ Final Thought

Bathroom remodels Sacramento should reflect both your lifestyle and your home’s long-term value. The smartest remodels combine thoughtful design, energy efficiency, and market-savvy upgrades.

Sarah Richardson’s approach reminds us: great style begins with great planning—and data-driven decisions result in spaces that are as beautiful as they are functional.

If you’re ready to rethink your bathroom, do it with clarity, confidence, and a plan that pays off.


🧰 CALL TO ACTION

Planning a bathroom remodel in Sacramento?
Our data-informed design-build team brings beauty, value, and peace of mind to every project. Let’s build your best space—intelligently.

read more

DreamLine Lioher Cabinets: A Minimalist & Clean Cabinetry Solution

Bespoke Kitchen Cupboards

In the world of elevated interior design, cabinetry plays a pivotal role in defining the rhythm and clarity of a space. For those seeking a minimalist, functional, and aesthetically refined kitchen or bathroom environment, DreamLine Lioher cabinets offer an exceptional solution. This clean, authoritative guide outlines why these European-inspired cabinets are increasingly favored by designers and homeowners who value simplicity with substance.


A Design Philosophy Rooted in Simplicity

DreamLine Lioher cabinets are guided by principles of balance, proportion, and visual lightness. These are not trend-driven products—they are timeless tools for creating intentional, clutter-free interiors.

Key features include:

  • Flat-panel door fronts with integrated or minimalist hardware

  • Matte and high-gloss finishes designed to diffuse or reflect light subtly

  • Neutral, desaturated color palettes curated for versatile modern spaces

Design Insight: Thoughtfully restrained cabinetry allows the architectural elements of your home—wood flooring, stone countertops, and natural light—to take center stage.

bespoke kitchen cupboards

Material Integrity and Durability

The value of a clean design lies not only in its appearance but in its performance. Lioher uses advanced materials engineered for both style and resilience:

  • Scratch- and fingerprint-resistant coatings

  • Moisture-resistant composite cores for durability in kitchens and bathrooms

  • UV-stable surfaces to maintain color consistency over time

Every component is manufactured to exacting standards, ensuring that the visual purity of each cabinet is matched by its structural integrity.


Function-Led Design for Modern Living

Minimalism is not about having less—it’s about needing less. Lioher cabinets are designed to maximize usable space with clean geometry and efficient storage configurations.

Applications include:

  • Handleless doors with push-latch or integrated profiles

  • Vertical lift doors for seamless wall cabinet access

  • Base drawers with concealed compartments for organization

Authoritative Principle: Storage should be silent, seamless, and supporting—not visually distracting or overdesigned.


Sustainable Craftsmanship

Lioher aligns with sustainability standards that support both indoor air quality and responsible sourcing:

  • CARB2-compliant panel materials

  • Low-VOC adhesives and finishes

  • Eco-conscious production methods

Minimalist design extends to environmental impact—delivering beauty without excess.


Application Versatility

While these cabinets are most commonly used in kitchens, their design language suits a range of spaces:

  • Primary and guest bathrooms

  • Mudrooms and utility rooms

  • Laundry spaces and built-in storage walls

  • Open shelving integration in living rooms or workspaces

In each case, the result is the same: clean lines, modern clarity, and long-lasting elegance.


Final Thoughts

DreamLine Lioher cabinets represent a disciplined approach to contemporary living. With a restrained design palette, enduring material choices, and functionality that prioritizes clarity and calm, they are an essential component of a minimalist interior.

Call to Action

Interested in incorporating DreamLine Lioher into your next project? Our design team is available to help translate your vision into a space that reflects refined minimalism and timeless utility.

read more

Walk-In Shower Remodeling: A Formal Comparative Guide to Modern Bathroom Design

Walk-In Shower Remodeling: A Formal Comparative Guide to Modern Bathroom Design

In the evolving world of bathroom renovations, walk-in shower remodeling stands as one of the most sought-after upgrades. Combining visual openness, accessibility, and modern aesthetics, walk-in showers offer both style and practicality. This comparative guide explores key design considerations and remodel options to help you make a well-informed, design-forward decision.


Walk-In Showers vs. Traditional Tubs: A Functionality Comparison

FeatureWalk-In ShowerTraditional Bathtub
AccessibilityBarrier-free, ideal for all agesRequires stepping over edge
Space UtilizationCustomizable to various layoutsRequires more floor space in small baths
Cleaning & MaintenanceEasier to clean, fewer contoursCan require more upkeep (grout, tub base)
Visual ImpactModern, open designClassic appeal, often enclosed
Resale ValueHigh among buyers seeking luxury featuresDepends on buyer needs (families with kids)

Insight: For homeowners focused on long-term functionality and clean design, walk-in showers offer a clear edge, particularly in master bathrooms and small-space layouts.


Walk-In Shower Remodeling: A Formal Comparative Guide to Modern Bathroom Design

Frameless Glass vs. Partial Enclosure: Style and Light

Frameless glass enclosures create seamless sightlines and enhance natural light, ideal for contemporary aesthetics.

Enclosure StyleFrameless GlassPartial Enclosure or Curtain
Aesthetic AppealMinimalist, elegantBudget-friendly, traditional
CostHigher investmentLower upfront cost
Durability & LongevityThick tempered glass, long-lastingMay require replacements or upgrades

Design Tip: Frameless enclosures are a top recommendation for those seeking elevated visual appeal and timeless value.


Tile vs. Solid Surface Materials: Maintenance and Mood

Choosing the right shower wall and floor material can affect durability, visual continuity, and upkeep.

Material TypeTile (Porcelain, Ceramic)Solid Surface (Acrylic, Stone Composite)
Design VersatilityWide range of colors, patternsSleek, uniform finishes
MaintenanceRequires grout maintenanceLow maintenance, no grout lines
Cost RangeModerate to highModerate to high, depending on material

Aesthetic Insight: Tile allows for artistic detail, while solid surface materials excel in minimalist and spa-inspired bathrooms.


Niche Features: Customization Options That Matter

Modern walk-in showers are defined by how well they serve the user’s habits. Consider the impact of:

  • Built-in bench seating for comfort and accessibility

  • Recessed wall niches for storage without bulk

  • Dual showerheads or rainfall features for luxury experience

  • Heated flooring and anti-fog mirrors for enhanced comfort

Comparison Note: These features can increase cost, but their contribution to functionality and luxury is considerable.


Final Thoughts

Walk-in shower remodeling presents a modern solution that can increase both the enjoyment and value of your home. Whether you prioritize low maintenance, high design, or accessibility, understanding your options side-by-side will empower a confident, elegant decision.

Call to Action

Planning a walk-in shower remodel? Our expert design team can help you weigh your options, select materials, and create a tailored space that reflects both form and function.

read more

Kitchen Plumbing: Let’s Talk Flow, Function & Style

Kitchen Plumbing: Let's Talk Flow, Function & Style

You might not think about your kitchen plumbing every day—until a faucet starts dripping, your garbage disposal makes an ominous grinding noise, or you’re knee-deep in a remodel and realize your dream island sink needs, well, actual pipes.

But here’s the good news: you don’t have to be a plumber to understand the basics. With a little guidance, a few insider tips, and a dash of thoughtful design, you can have plumbing that works as beautifully as it looks. So, let’s walk through it together—because great design is about form and function.


Start With the Sink (Because It’s the Star)

The sink is the hub of your kitchen. It handles prep, cleaning, and sometimes even multitasks as a pasta strainer, dog bath, or plant-watering station.

Vern’s Tip: Choose a sink that suits your lifestyle. If you cook often, go big and deep. Love a clean aesthetic? Consider an under-mount model for seamless countertops.

Plumbing-wise, ensure the drain, water lines, and garbage disposal are all placed for easy access. And yes, that means planning BEFORE the cabinet guy shows up.


Know Your Water Lines

Hot and cold water supply lines are the veins of your kitchen. They connect to the sink, dishwasher, and often the refrigerator.

Did You Know? You can add a shut-off valve under the sink for each appliance—it makes future maintenance a breeze.

And if your kitchen is on the opposite side of the house from your water heater, you may want to consider a hot water recirculation pump. No more waiting 90 seconds for warm water to rinse a plate.

Kitchen Plumbing: Let's Talk Flow, Function & Style

Dishwasher Plumbing Done Right

Don’t skip the air gap or high loop (depending on your local code). This tiny little feature prevents dirty water from flowing backward into your dishwasher.

Vern’s Design Thought: Keep dishwasher placement next to your sink. It shortens drain lines and keeps plumbing simple—plus, it’s convenient when you’re loading.


Garbage Disposals: Worth the Investment

A well-installed disposal is a small luxury that adds serious function. But it needs:

  • Proper alignment with your drain

  • A switch within reach

  • Anti-vibration mounts (so you don’t shake the whole house when you turn it on)

Add a flange that matches your faucet finish for that thoughtful designer touch.


Water Filtration: The Underrated Upgrade

If your tap water isn’t the best, under-sink filters or reverse osmosis systems can be added right into your plumbing line.

Bonus: You can even run a separate line to your fridge’s water dispenser or coffee machine.


Final Thoughts

Plumbing might not be the most glamorous part of your kitchen, but it’s the quiet hero that supports every meal, every cleanup, and every cup of tea. With a little planning and some smart choices, your kitchen can flow effortlessly—in every sense of the word.

Call to Action

Ready to update your kitchen plumbing or plan a smarter remodel? Our team can help bring together thoughtful design and plumbing precision to make your kitchen truly work for you.

read more

Two Paths, One Purpose: Comparing Design Approaches in a Sacramento Remodel

Front doors

Every remodel tells a story. And every homeowner stands at a crossroads: modernize with restraint, or reimagine with distinction.

In Sacramento—a city where historic charm and contemporary style often collide—remodeling choices are never just cosmetic. They’re about defining how we live. Whether you’re upgrading to sell or curating your “forever kitchen,” a Sacramento remodel demands thoughtful planning and purposeful design..

Let’s examine two distinct approaches: Standard Remodels vs. Elevated Design Remodels, and explore how each affects function, finish, and long-term value.


I. Design Intent: Function vs. Identity

Standard RemodelElevated Design Remodel
Focuses on practical updates: appliances, layout tweaks, refreshed surfaces.Reimagines the kitchen as a personal expression of style, with holistic upgrades to layout, flow, and materiality.
Often led by resale value and ROI goals.Prioritizes lifestyle, longevity, and design integrity.

In many Sacramento neighborhoods, homeowners begin with modest intentions, but as the design unfolds, they discover that true luxury isn’t about excess—it’s about authenticity.

Bespoke Kitchen Cupboards

II. Cabinetry: The Core of the Kitchen

Cabinetry is the visual and functional anchor of any kitchen space. And here, the divide between standard and luxury becomes pronounced.

Standard Cabinets

Luxury Kitchen Cabinets

Stock or semi-custom configurations.Fully custom, built to fit space and lifestyle.
Basic finishes, limited colors.Hand-finished options, high-gloss lacquers, natural woodgrains.
Standard hardware and hinges.Integrated lighting, soft-close mechanisms, hidden pulls, custom hardware.

Luxury cabinetry from designers like DreamLine not only elevates the kitchen visually—it enhances how the kitchen feels to live in.


III. Material Selections: Cost-Efficient vs. Curated

Materiality defines tone. In a standard remodel, choices are often made based on price point and practicality. In a design-led remodel, selections are curated with intention.

Remodel TypeSurfacesLightingHardware
StandardLaminate countertops, ceramic tile.Single-zone LED or fluorescent.Brushed nickel, off-the-shelf.
ElevatedQuartzite, honed marble, or warm-tone quartz.Layered lighting: ambient, task, and accent.Mixed finishes, custom-ordered, often artisanal.

When executed with care, an elevated Sacramento remodel turns daily routine into something quietly luxurious.


IV. Spatial Flow: Adjusted vs. Reimagined

Standard remodeling might reposition appliances or extend countertops. But elevated design rethinks the entire experience—how people enter, cook, move, and gather.

Features in luxury remodels often include:

  • Concealed walk-in pantries

  • Island seating integrated with multi-height prep surfaces

  • Cabinetry zones designed for specific activities (baking, entertaining, coffee prep)

  • Flush transitions between kitchen and dining spaces

This is where form meets true function—and where design feels lived-in and intuitive.


V. Investment: Budget vs. Lasting Value

While elevated remodels may cost more upfront, they pay dividends over time—in longevity, resale, and the intangible pleasure of waking up to a space that reflects your personal vision.

Standard RemodelElevated Remodel
$30k–$60k$85k–$150k+
ROI-focused, 3–5 year impact.Lifestyle-driven, 10–20 year impact.

And in cities like Sacramento, where real estate remains highly competitive, elevated kitchens stand out in both buyer appeal and listing performance.


Final Thoughts from Nate

Design is never a checklist—it’s a conversation between your space and your story.

Whether your Sacramento remodel calls for restraint or reinvention, invest in the pieces that shape your everyday life. Let your materials speak softly. Let your kitchen feel both grounded and elevated.

And when in doubt, remember: good design listens. Great design endures.


Would you like a follow-up chart comparing lighting plans or a full-page design decision matrix? I’d be happy to build it.

read more

Painting Cupboards: Transform Your Space with a Fresh Coat

Painting Cupboards: Transform Your Space with a Fresh Coat

Painting cupboards is one of the simplest and most impactful ways to breathe new life into your kitchen or bathroom. Whether you’re looking for a cozy farmhouse charm or a sleek modern aesthetic, a fresh coat of paint can completely transform the feel of your space. At Rocklin Kitchen Reface PRO, we specialize in helping homeowners revitalize their cabinets with professional-grade painting services designed to impress.

Why Choose to Paint Your Cupboards?

Repainting cupboards is a cost-effective and versatile option for updating your space without a full remodel. Here’s why it’s such a popular choice:

  • Affordable: A fraction of the cost of replacing cupboards.
  • Customizable: Endless color options let you tailor your look to your style.
  • Quick Upgrade: A project that can typically be completed in just a few days.
  • Eco-Friendly: Keeps your existing cabinets out of the landfill.

Choosing the Right Paint for Your Cupboards

Selecting the perfect paint ensures both durability and aesthetic appeal. Here are some tips:

  • Finish Matters: Opt for semi-gloss or high-gloss paint for easy cleaning and a polished look.
  • Quality Counts: High-quality paints provide better coverage and longevity.
  • Consider Colors: Light tones like white or pastel can open up a small kitchen, while darker hues add drama and sophistication.

The Painting Process

Painting cupboards isn’t just about slapping on a new coat. It’s a detailed process that requires patience and precision:

  1. Preparation: Clean, sand, and prime the cupboards to ensure the paint adheres properly.
  2. Disassembly: Remove doors, drawers, and hardware for a smooth application.
  3. Priming: Apply a high-quality primer to block stains and create an even base.
  4. Painting: Use smooth, even strokes with a brush or spray gun for a flawless finish.
  5. Reassembly: Once the paint is dry, reattach doors and hardware.

Popular Styles and Inspirations

Here are a few trending cupboard painting styles to consider:

  • Classic White: Timeless and versatile, white cupboards work well in any space.
  • Two-Tone: Use one color for upper cabinets and another for lower ones to create visual interest.
  • Bold Accents: Choose a striking color like navy blue or emerald green to make a statement.
  • Neutral Palettes: Soft greys, beiges, and taupes provide an understated, elegant look.

Maintaining Painted Cupboards

To keep your newly painted cupboards looking pristine:

  • Gentle Cleaning: Wipe with a damp cloth and mild soap; avoid abrasive cleaners.
  • Regular Touch-Ups: Address chips or scratches promptly with matching paint.
  • Protect Against Moisture: Keep cupboards dry to prevent bubbling or peeling.

Why Choose Rocklin Kitchen Reface PRO?

At Rocklin Kitchen Reface PRO, we bring expertise and a touch of artistry to every cupboard-painting project.

  • Experienced Professionals: We handle the prep and painting with precision.
  • Premium Products: High-quality paints and finishes ensure lasting beauty.
  • Tailored Results: From color selection to finish, we help you achieve your dream design.

Transform your kitchen or bathroom with the simple yet stunning impact of freshly painted cupboards. Whether you’re after a cozy cottage vibe or a modern minimalist feel, let us bring your vision to life.

Painting Cupboards: Transform Your Space with a Fresh Coat
read more

Siding Maintenance Tips for Longevity and Appeal

Siding Maintenance Tips for Longevity and Appeal

Maintaining your home’s siding is crucial not only for aesthetics but also for ensuring its durability and protecting your investment. Proper siding maintenance can extend its lifespan, enhance curb appeal, and save you from costly repairs down the line. Whether your siding is made from vinyl, fiber cement, wood, or metal, regular upkeep will keep it looking its best. Here are some essential tips for siding maintenance to help you preserve the beauty and functionality of your home’s exterior.

1. Regular Inspections

One of the first steps in siding maintenance is conducting regular inspections. Make it a habit to check your siding at least twice a year, preferably in spring and fall. Look for any signs of wear or damage, such as:

  • Cracks or Chips: Check for visible cracks or chips in the material, which can lead to further damage if not addressed.
  • Fading or Discoloration: Sun exposure can cause fading, especially on vinyl siding. If you notice significant discoloration, it may be time to consider repainting or replacing sections.
  • Mold or Mildew: Inspect for mold or mildew growth, particularly in damp areas or where the siding may not receive direct sunlight.
  • Pests: Look for signs of insect infestations, such as holes, frass (wood dust), or nests, particularly in wood siding.

2. Clean Regularly

Cleaning your siding regularly is essential for removing dirt, grime, and mold that can accumulate over time. Here are some effective cleaning methods for different siding materials:

  • Vinyl Siding: Use a mixture of water and mild detergent to wash vinyl siding. A soft brush or sponge can help remove stubborn stains. For tough mildew, a solution of vinegar and water can be effective. Rinse thoroughly with a hose.

  • Fiber Cement Siding: Similar to vinyl, fiber cement can be cleaned with water and a mild detergent. Use a soft-bristle brush and avoid pressure washers, as they can damage the surface. Rinse well after cleaning.

  • Wood Siding: Wood siding requires special attention to prevent damage. Use a gentle cleaner specifically designed for wood. A pressure washer should be used cautiously and set at a low pressure to avoid damaging the wood.

  • Metal Siding: For metal siding, a mix of soap and water works well. Use a soft cloth or sponge to clean the surface, ensuring you rinse away any soap residue.

3. Address Repairs Promptly

Addressing any repairs promptly is vital for maintaining your siding’s integrity. If you notice any damage, such as cracks, holes, or warping, take immediate action to repair them. For example:

  • Vinyl and Fiber Cement: Use caulk or patching compounds to fill small cracks or holes. For larger damages, you may need to replace panels.

  • Wood Siding: Replace any rotting or damaged boards as soon as possible. This prevents water infiltration, which can lead to mold and further decay.

  • Metal Siding: Look for dents or scratches and repair them with touch-up paint or replacement panels as needed.

4. Caulking and Sealing

Proper caulking and sealing around windows, doors, and joints are crucial for preventing water infiltration. Over time, caulk can wear away or crack, leading to moisture damage behind the siding. Here’s what to do:

  • Inspect Existing Caulking: Check the caulking around windows, doors, and seams. If you notice cracks or gaps, remove the old caulk and replace it with a high-quality exterior caulk.

  • Sealant Application: Consider applying a sealant to wood siding to enhance water resistance. This will help protect the wood from moisture and UV damage.

5. Protect Against the Elements

While your siding is designed to withstand the elements, taking additional precautions can help prolong its life:

  • Trimming Vegetation: Ensure that shrubs, trees, and vines are trimmed away from your siding to prevent moisture retention and pest infestations. This will also allow for better airflow around your home.

  • Gutters and Downspouts: Keep gutters and downspouts clean and functioning properly. Clogged gutters can lead to water overflow, which may damage your siding.

  • Winter Preparation: In colder climates, inspect your siding for any cracks or gaps that may allow cold air in. Insulating your home can also reduce strain on the siding during winter months.

6. Painting and Finishing

Regularly painting or finishing your siding, especially if it’s wood or fiber cement, can help protect it from the elements. Here are some tips:

  • Choose the Right Paint: For wood siding, select an exterior-grade paint that is suitable for your climate. If you’re painting fiber cement, make sure to use paint that adheres well to that material.

  • Repainting Frequency: Depending on the material, you may need to repaint every 5 to 10 years. Keep an eye on the paint condition and address any peeling or fading.

  • Staining Wood Siding: If your siding is made from wood, consider using a stain that offers both color and protection against UV rays and moisture.

7. Professional Inspections and Maintenance

While DIY maintenance is essential, consider scheduling professional inspections and maintenance periodically. Professionals can provide an in-depth assessment of your siding and recommend specific services, such as power washing or repainting, to ensure your home remains in optimal condition.

Conclusion

Taking the time to properly maintain your siding will not only enhance your home’s curb appeal but also extend the life of the materials and protect your investment. By conducting regular inspections, cleaning your siding, addressing repairs promptly, and following these maintenance tips, you can keep your home looking beautiful and well-maintained for years to come. Remember, your siding is not just an aesthetic feature; it plays a vital role in protecting your home from the elements.

Siding Maintenance Tips for Longevity and Appeal
read more

How to Design a Family-Friendly Bathroom

Modern Bathroom Design Trends for 2024

A family-friendly bathroom balances functionality, safety, and durability to create a space that’s comfortable and practical for every family member. With thoughtful design elements, you can ensure that your bathroom meets the needs of both children and adults. Here are some essential tips for designing a family-friendly bathroom that everyone will enjoy.

1. Prioritize Safety Features

Safety is key when designing a bathroom that’s accessible for all ages. By implementing a few simple safety features, you can create a worry-free environment for children, older adults, and everyone in between.

Safety Essentials:

  • Slip-Resistant Flooring: Choose materials like textured tiles, rubber flooring, or non-slip mats to prevent accidents on wet surfaces.
  • Rounded Edges: Opt for vanities, countertops, and fixtures with rounded edges to minimize injuries, especially for younger children.
  • Anti-Scald Faucets: Installing anti-scald valves or thermostatic mixers helps prevent accidental burns from hot water.

2. Choose Durable, Easy-to-Clean Materials

Bathrooms experience high traffic, and with multiple users, choosing durable, low-maintenance materials is essential. Look for materials that can handle frequent use and are easy to clean.

Material Suggestions:

  • Porcelain or Ceramic Tiles: These tiles are durable, water-resistant, and easy to wipe down, making them ideal for floors and walls.
  • Quartz Countertops: Quartz is stain-resistant and low-maintenance, perfect for busy family bathrooms.
  • High-Quality Fixtures: Invest in fixtures and hardware made of rust-resistant materials like stainless steel or brass, which are both durable and easy to maintain.

3. Opt for Plenty of Storage

Storage is crucial in a family bathroom to keep essentials organized and accessible. Ample storage helps reduce clutter, making the space more functional and visually appealing.

Storage Solutions:

  • Vanity with Drawers: A vanity with pull-out drawers provides easy access to toiletries and other essentials while maximizing under-sink space.
  • Wall-Mounted Shelves: Use wall space for additional storage, keeping items within reach without taking up floor space.
  • Baskets and Bins: Add bins or baskets for storing towels, toys, and other family bathroom essentials, keeping them neatly organized.

4. Use a Practical Layout

A practical layout is essential for a family-friendly bathroom, ensuring ample space for everyone to move around comfortably. Design with functionality in mind, and consider how each family member will use the space.

Layout Tips:

  • Separate Zones: If possible, create separate zones for the shower, toilet, and vanity to allow multiple users at once.
  • Double Sinks: A double-sink vanity can help speed up morning routines by allowing two people to use the sink simultaneously.
  • Step Stools: For families with young children, a step stool near the sink makes handwashing and brushing teeth more accessible.

5. Add Kid-Friendly Features

Incorporating features that are accessible and appealing to kids can make the bathroom more enjoyable and functional for them.

Kid-Friendly Additions:

  • Low Hooks and Towel Bars: Install hooks and towel bars at a lower height, so children can easily reach their towels and robes.
  • Colorful Accessories: Use bright, fun towels, rugs, or shower curtains to create a kid-friendly feel without permanent changes.
  • Storage Bins for Toys: Add a waterproof basket or bin in the bathtub or shower area for storing bath toys, keeping them organized and ready for playtime.

6. Make it Adaptable

As children grow and family needs change, an adaptable bathroom design will save time and money on future renovations. Choose elements that can easily transition as the family evolves.

Adaptable Design Ideas:

  • Adjustable Showerheads: A showerhead with an adjustable height or a handheld option makes it easy for both kids and adults to use.
  • Neutral Color Scheme: A neutral palette provides a timeless look and allows you to update the bathroom with accessories as styles and preferences change.
  • Removable Features: Choose removable, non-permanent fixtures for kid-specific needs (like a step stool or bath mat) to allow for flexibility as children grow.

7. Enhance Comfort for All Ages

Create a welcoming space by adding comfort-focused elements that the entire family can enjoy.

Comfort Features:

  • Heated Floors: Radiant floor heating adds warmth, making the bathroom more inviting, especially in colder months.
  • Soft-Close Doors and Drawers: Soft-close mechanisms on cabinets and drawers reduce noise, creating a quieter, more relaxing space.
  • Good Lighting: Proper lighting, especially around the mirror and vanity, improves visibility and safety while enhancing the bathroom’s ambiance.

Final Thoughts

Designing a family-friendly bathroom requires attention to safety, durability, and convenience for all ages. By incorporating these elements, you can create a bathroom that’s safe, functional, and comfortable for every family member. Whether you’re working with a large or small space, a family-friendly bathroom design will make daily routines smoother and more enjoyable for everyone.

How to Design a Family-Friendly Bathroom
read more